In this post, I will show you how to test your bots using Microsoft Fakes. Details of this post:
- Windows: Windows 10 Enterprise
- Visual Studio: Version 15.2 (26430.6) Release
- Packages:
- Autofac: version 4.6.0
- Chronic.Signed: version 0.3.2
- Microsoft.AspNet.WebApi.Client: version 5.2.3
- Microsoft.AspNet.WebApi.Core: version 5.2.3
- Microsoft.Bot.Builder: version 3.8.1.0
- Microsoft.IdentityModel.Protocol.Extensions: version 1.0.4.403061554
- Microsoft.Rest.ClientRuntime: version 2.3.8
- MSTest.TestAdapter: version 1.1.17
- MSTest.TestFramework: version 1.1.17
- Newtonsoft.Json: version 10.0.2
- System.IdentityModel.Tokens.Jwt: version 4.0.4.403061554
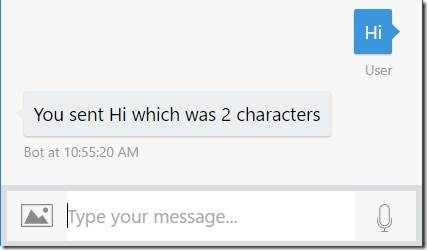
I used the Bot Application template you can download from Create a bot with the Bot Builder SDK for .NET. This template creates a very simple Echo Bot.
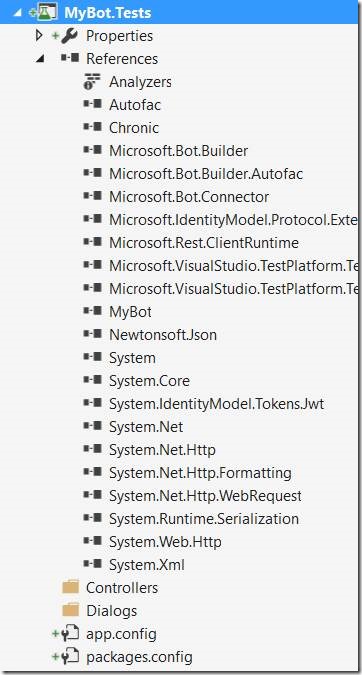
To begin, we need to add a new Unit Test Project to the solution.

Now add a reference to the bot project and Microsoft.Bot.Builder, delete the default test class, and add a “Controllers” and “Dialogs” folder.
We are going to start off with the easy test that does not require fakes but will introduce us to testing async methods. Create a new test class named “MessagesControllerTests” in the “Controllers” folder of your test project. Change the name and return type of the generated test to:
public async Task Returns_HttpStatusCode_DeleteUserData()
Notice the addition of the async keyword and Task return type. This is very important for testing async methods. Copy and paste the code below into the test method.
// Arrange
var target = new MessagesController()
{
   Request = new System.Net.Http.HttpRequestMessage()
};

// Act
var activity = new Activity(ActivityTypes.DeleteUserData);
var task = await target.Post(activity);

// Assert
Assert.AreEqual(System.Net.HttpStatusCode.OK, task.StatusCode);
Use the light bulb to add all the required using statements.

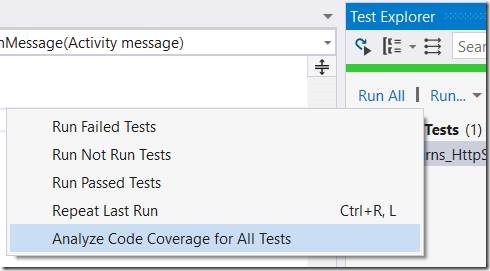
If you run the test now, it should pass. Run the test again and analyze code coverage.
What you will see is we have covered the first if statement of the HandleSystemMessage method.
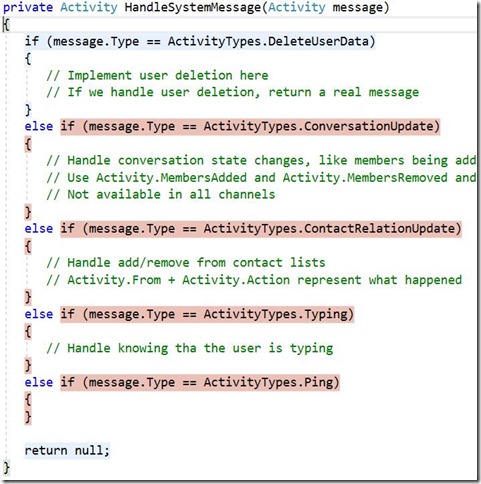
To cover the other branches, simply copy and paste the test and change the name of the test and value of the Type property of the Activity to match the other types. We are not going to test the code in Global.asax.cs or WebApiConfig.cs. To remove them from the code coverage analysis, simply add the ExcludeFromCodeCoverage attribute to each file above the class.

Once all variations of the Returns_HttpStatusCode test are written, the only line not covered in MessagesController.cs will be the await line.
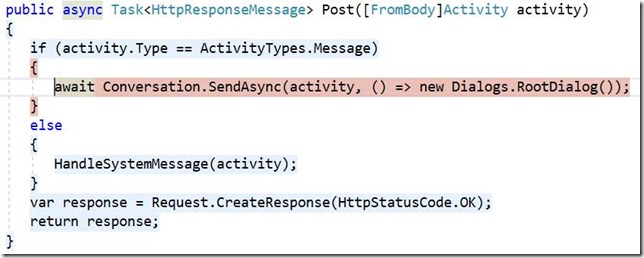
To test this line, we want to ensure that we are provided a constructor for the RootDialog class. To do that, we are going to fake the call to SendAsync and verify that we can create a RootDialog with the provided Func<IDialog<object>>. To determine which assembly I need to fake, I place my cursor inside SendAsync and press F12.

This will take me to the declaration of this method. At the top of the file, you will see the name of the assembly you need to fake.
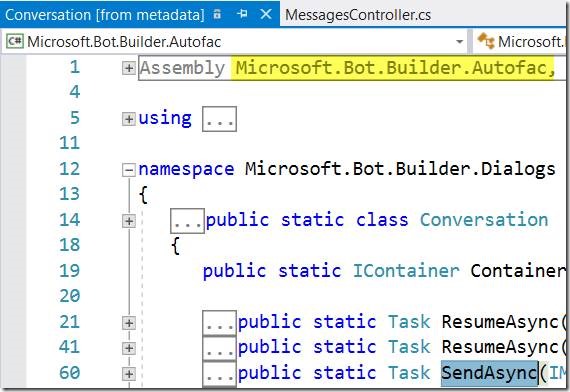
From solution explorer, right-click on that reference in your test project and select “Add Fakes Assembly.”

This will add a new “Fakes” folder to your test project with a Fakes file for Microsoft.Bot.Builder.Autofac. When I fake an assembly, I only fake the portions of the assembly that I intend to use. By default, Fakes will attempt to stub and shim every type of the assembly. This can lead to warnings and increase your build time. By only faking what you need, you can avoid both of those situations. Double-click the file to open it. To see any warnings that may be created, add the Diagnostic attribute to the root Fakes element and set its value to true.

Now we need to tell Fakes to only fake what we want. To do this, clear the stubs and shims by adding clear elements.
<Fakes xmlns="http://schemas.microsoft.com/fakes/2011/" Diagnostic="true">
   <Assembly Name="Microsoft.Bot.Builder.Autofac" Version="3.8.1.0"/>
   <StubGeneration>
      <Clear/>
   </StubGeneration>
   <ShimGeneration>
      <Clear/>
   </ShimGeneration>
</Fakes>
Stubs are for interfaces and shims are for concrete types. Because we are needing to fake SendSync of the static class Conversation we need to use shims. Therefore, under the clear element of the shims node add:
<Add FullName="Microsoft.Bot.Builder.Dialogs.Conversation"/>
If you build the project now, you will get a series of warnings about shims that could not be generated. To clear these warnings, we are going to explicitly remove them.
<ShimGeneration>
<Clear />
<Add FullName="Microsoft.Bot.Builder.Dialogs.Conversation"/>
<Remove FullName="Microsoft.Bot.Builder.Dialogs.Conversation+<>c"/>
<Remove FullName="Microsoft.Bot.Builder.Dialogs.Conversation+<ResumeAsync>d__7"/>
<Remove FullName="Microsoft.Bot.Builder.Dialogs.Conversation+<ResumeAsync>d__8"/>
<Remove FullName="Microsoft.Bot.Builder.Dialogs.Conversation+<SendAsync>d__6"/>
<Remove FullName="Microsoft.Bot.Builder.Dialogs.Conversation+<SendAsync>d__9"/>
</ShimGeneration>
Now building the project will have 0 errors and 0 warnings. With the shim in place, we can write our test. Simply copy and paste the code below into your test class and use the light bulb to add all the required using statements.
[TestMethod]
public async Task Returns_HttpStatusCode_StartsRootDialog()
{
   using (ShimsContext.Create())
   {
      // Arrange
      var sendAsyncCalled = false;
      var isCorrectDialog = false;
      var activity = new Activity(ActivityTypes.Message);

      var target = new MessagesController()
      {
         Request = new System.Net.Http.HttpRequestMessage()
      };

      // Fake the call to Conversation.SendAsync
      Microsoft.Bot.Builder.Dialogs.Fakes.ShimConversation.SendAsyncIMessageActivityFuncOfIDialogOfObjectCancellationToken = (a, d, t) =>
      {
         sendAsyncCalled = true;

         // See if the type of dialog is correct
         isCorrectDialog = d() is RootDialog;

         return Task.CompletedTask;
      };

      // Act
      var task = await target.Post(activity);

      // Assert
      Assert.IsTrue(sendAsyncCalled, "SendAsync was not called");
      Assert.IsTrue(isCorrectDialog, "The wrong dialog was provided");
      Assert.AreEqual(task.StatusCode, System.Net.HttpStatusCode.OK, "The wrong status code was returned");
   }
}
Just like the other tests, notice the Task return type and async keyword. Because we are using a shim in our test, we must wrap the code in the using block where we create a ShimContext. This makes sure the shims are restricted to the code in the using block. Fakes allows you to use delegates to fake the original implementation of a method or property on a class or interface. We need to replace the implementation of SendAsync so we can see if the correct dialog is being created. In our implementation, we set a flag letting us know that that the method was indeed called. We then test if the method passed in creates a RootDialog or not. Finally we return Task.CompletedTask so the await will return in the method under test. The rest of the test is self-explanatory.
At this point, if you run all the test and analyze code coverage you should have 100% of the code tested in the MessagesController class.

Now we can move to the dialog class. Looking at the code for the RootDialog class you can see the real logic is in the private method.
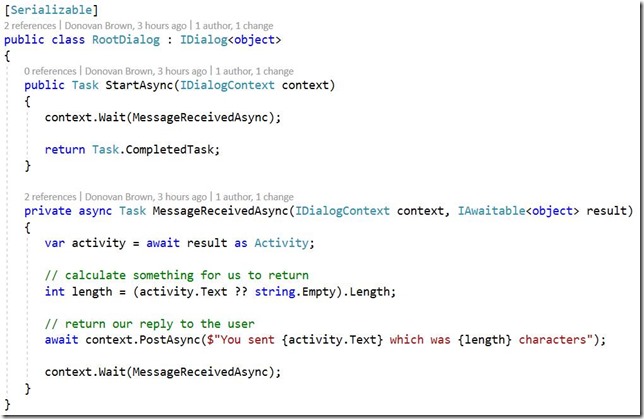
The only way to call the MessageReceivedAsync method is to fake the call to Wait in the StartAsync method and call it using the delegate passed to Wait. As we did before, place your cursor in Wait and press F12. Notice that this method is not on the IDialogContext interface but in a class that creates extensions for the IDialogContext interface. If it was in IDialogContext we would be able to use a stub. However, because it is in a class, we must use a shim. The Microsoft.Bot.Builder.Dialogs.Extensions that defines Wait is in the Microsoft.Bot.Builder assembly. So, right-click on the Microsoft.Bot.Builder assembly in your test project and select Add Fakes Assembly. Just like before, add the Diagnostics attribute and clear the default stubs and shims. Below the clear element, add Microsoft.Bot.Builder.Dialogs.Extensions. Build to see the warnings and add removes to clear them.
<ShimGeneration>
<Clear/>
<Add FullName="Microsoft.Bot.Builder.Dialogs.Extensions"/>
<Remove FullName="Microsoft.Bot.Builder.Dialogs.Extensions+<>c"/>
<Remove FullName="Microsoft.Bot.Builder.Dialogs.Extensions+<Forward>d__13`1"/>
<Remove FullName="Microsoft.Bot.Builder.Dialogs.Extensions+<PostAsync>d__10"/>
<Remove FullName="Microsoft.Bot.Builder.Dialogs.Extensions+<SayAsync>d__11"/>
</ShimGeneration>
To call StartSync, we also need an IDialogContext. We can use stubs to fake this interface. Once we fake the call to Wait, we are going to want to call the delegate. This is going to require an IAwaitable<object> as a parameter. Because IAwaitable is also an interface, we can use stubs to fake it as well. Pressing F12 on IAwaitable, I found that it returns an IAwaiter. We will need to stub this as well. With all the interfaces identified, I updated my fakes file.
<StubGeneration>
   <Clear/>
   <Add FullName="Microsoft.Bot.Builder.Dialogs.IAwaitable"/>
   <Add FullName="Microsoft.Bot.Builder.Dialogs.IDialogContext"/>
   <Add FullName="Microsoft.Bot.Builder.Internals.Fibers.IAwaiter"/>
</StubGeneration>
With all the types shimmed and stubbed, we can start working on our test. Right-click the Dialogs folder in your test project and add a new test class named “RootDialogTests.” Copy and paste this code into your class over the default test.
[TestMethod]
public async Task MessageReceivedAsync_HelloWorld()
{
   using (ShimsContext.Create())
   {
      // Arrange
      var waitCalled = false;
      var message = string.Empty;
      var postAsyncCalled = false;

      var target = new RootDialog();

      var activity = new Activity(ActivityTypes.Message)
      {
         Text = "Hello World"
      };

      var awaiter = new Microsoft.Bot.Builder.Internals.Fibers.Fakes.StubIAwaiter<IMessageActivity>()
      {
         IsCompletedGet = () => true,
         GetResult = () => activity
      };

      var awaitable = new Microsoft.Bot.Builder.Dialogs.Fakes.StubIAwaitable<IMessageActivity>()
      {
         GetAwaiter = () => awaiter
      };

      var context = new Microsoft.Bot.Builder.Dialogs.Fakes.StubIDialogContext();

      Microsoft.Bot.Builder.Dialogs.Fakes.ShimExtensions.PostAsyncIBotToUserStringStringCancellationToken = (user, s1, s2, token) =>
      {
         message = s1;
         postAsyncCalled = true;
         return Task.CompletedTask;
      };

      Microsoft.Bot.Builder.Dialogs.Fakes.ShimExtensions.WaitIDialogStackResumeAfterOfIMessageActivity = (stack, callback) =>
      {
         if (waitCalled) return;

         waitCalled = true;

         // The callback is what is being tested.
         callback(context, awaitable);
      };

      // Act
      await target.StartAsync(context);

      // Assert
      Assert.AreEqual("You sent Hello World which was 11 characters", message, "Message is wrong");
      Assert.IsTrue(postAsyncCalled, "PostAsync was not called");
   }
}
Because this test uses shims, we must create a ShimsContext and a using block. Next, create a few flags to ensure the fakes are called. Now fake the IAwaiter and IAwaitable interfaces. Finally, fake the PostAsync and Wait methods. The key to this test is the calling of the callback in the fake of Wait. This is where we are calling MessageReceivedAsync the true target of our test. This will call PostAsync, were we can store the string to assert at the end of our test. Copy and paste this test and name it MessageReceivedAsync_EmptyString. Do not set the Text property of the Activity. This test is required to test the path where the message is empty.
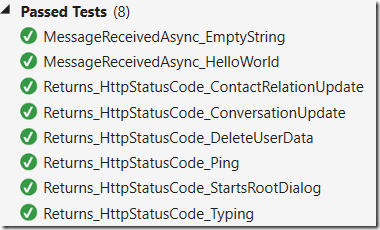
Running all the tests should now result in 100% code coverage of your bot.

You can download the sample project from my GitHub Repo.