While preparing to speak at TechEd Europe I really had to run Release Management and Desired State Configuration (DSC) through their paces. I already blogged about one of my challenges of implementing tokenization in a DSC based deployment here.
I also wanted to run Coded UI tests as part of my release. To do this I simply ran the attached PowerShell script during my release. The script is very similar to the tool I wrote for the Agent based deployment here.
In this post I simply share the ps1 file that is attached and explain how to add it to your pipeline. For this post I will be using Update 4 of Release Management.
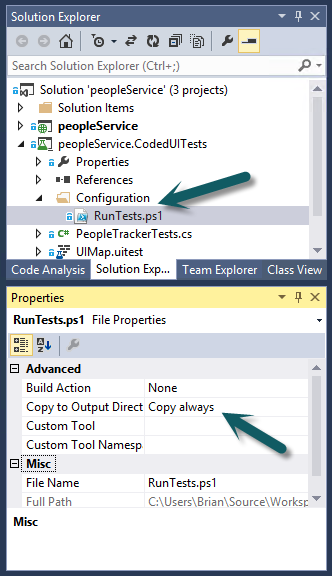
The first thing you have to do is make sure the ps1 file is in the drop location of your team build. There are several ways you can do this, however, I simply added a Configurations folder to my Coded UI Test project in Visual Studio. The most important part is to make sure that “Copy to Output Directory” is set to either “Copy if newer” or “Copy always”. This will ensure the file is in the drop location of the build.
Now queue a build and examine the drop location. You will need to know the relative path from the root of the drop location of your ps1 script for use in your “Deploy Using PS/DSC” action of your vNext Release Template.
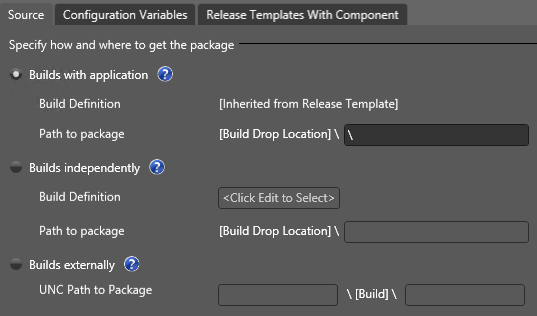
Now let’s add a new vNext component in Release Management. Select the “Builds with application” radio button and simply enter a “\” for the value.
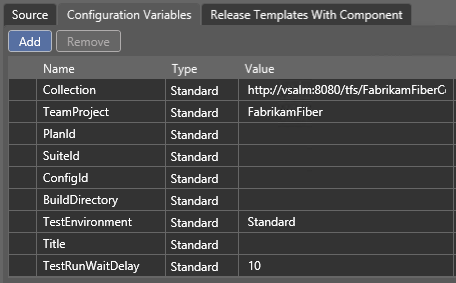
On the “Configuration Variables” tab you have to setup all the parameters for the ps1 file. Add each variable as a Standard configuration variable (Collection, TeamProject, PlanId, SuiteId, ConfigId BuildDirectory, TestEnvironment, Title and TestRunWaitDelay). You can refer to my previous post on where to locate the values for each configuration variable. One of the new features of Update 4 is the ability to define default values for variables that do not change very often. As you can see in the image below I set default values for Collection, TeamProject, TestEnvironment and TestRunWaitDelay.
With our component created we can move on to the vNext Release Template. Create a new one and add your components. Now drag the “Deploy Using PS/DSC” action onto the deployment sequence. Select the desired server from the ServerName dropdown. That server must already have a Test Agent configured on that machine with tcm.exe. The UserName and Password that are provided is an account that has permission to establish a Remote PowerShell connection to the target machine. Please note that in Update 3 of Release Management this is NOT the account that will execute your ps1. The ps1 in Update 3 is run by local system. Which means for this to work local system must have access to your TFS or you will get an access denied error. Select your test component in the ComponentName dropdown. Now enter the relative path to the ps1 file in the drop location. You can leave the rest of the values blank.
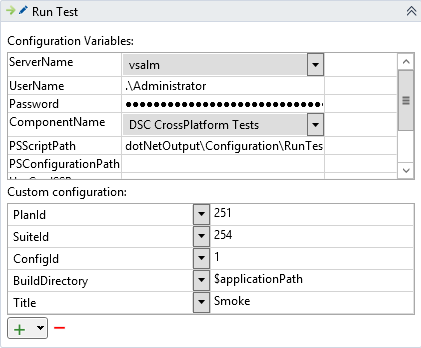
We now have to add the Custom configuration variables to the action. Click the plus button or use the down arrow and select “Standard variable”. On the newly added row select the configuration variable you want to set and enter the correct value. For the BuildDirectory variable enter “$applicationPath”. This variable is provided by Release Management and points to a location that contains the files of our component.
Now you should be able to run a new release and execute automated test.
RunTests.ps1 (4.94 kb)