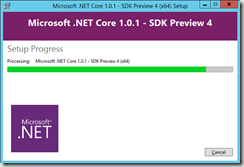
Today via Twitter I was asked how to build .NET Core csproj projects using Team Services. To work with csproj projects you have to be using at least .NET Core SDK 1.0 Preview 3 build 004056. As of this writing .NET Core SDK 1.0 Preview 4 build 004233 is already out and will be the version I will use for this post.
I did some investigation to see what versions were running on the Hosted agents of Team Services. Turns out at the time of this post it was running the following:
- .NET Command Line Tools (1.0.0-preview2-1-003177)
- Microsoft .NET Core Shared Framework Host (1.1.0)
 This would prevent us from using the Hosted agents and requires the use of a private agent. I am a huge fan of private agents and you can read why here. All I had to do was make sure my build machine had at least Preview 3 installed. Using the dotnet new command with the -t web option I created a new .NET Core project. Because I was using Preview 4 the project was create with a csproj.

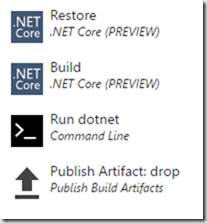
With my project created I committed my changes to a Team Services Git repository so I could create my build. The new .NET Core (PREVIEW) tasks are created based on the project.json project structure. You can use them for restore and build but it will not work for publish. Below are the tasks I used for my build and all the settings.

| Task | Values |
| .NET Core (PREVIEW) | Command: restore
Project(s): <leave empty>
Arguments: <leave empty> |
| .NET Core (PREVIEW) | Command: build
Project(s): <leave empty>
Arguments: --configuration $(BuildConfiguration) |
| Command Line | Tool: dotnet
Arguments: publish --configuration $(BuildConfiguration) --output $(Build.StagingDirectory)/pub |
| Publish Build Artifacts | Path to Publish: $(Build.StagingDirectory)/pub
Artifact Name: drop
Artifact Type: Server |
With our build complete we can move over to our release. Create a new release using the Azure App Service Deployment template. If you would like you can use ARM templates to provision your Web App or simply use the Azure Portal. In this post I will not cover those details. Regardless of how you decide to provision your Web App deploying to it only takes a single Azure App Service Deploy task.

| Task | Values |
| Azure App Service Deploy | Azure Subscription: <Authenticate your Azure Subscription>
App Service Name: <Select Web App>
Deploy to slot: <unchecked>
Virtual Application: <leave empty>
Package or Folder: $(System.DefaultWorkingDirectory)/**/drop
Publish using Web Deploy: <unchecked> |
You may have noticed that we did not create a zip file during our release. That is why we are pointing our deploy task to a folder instead. If you prefer you can create an Archive in your build and point this task at a zip file instead. I like using the folder because that gives my release easy access to files to tokenize before deployment.