After writing ASP.NET Core RC2, Meet Docker, I was asked to help create a .NET Core Docker demo. My role on the team was to handle the Visual Studio Team Services part which included building a single Linux VM that would act as the build agent and the Docker host.
The goal of this post is to show you how I built that Linux-based build agent with Docker installed. This will allow you to use a single machine for Team Services builds and build & publish Docker images. To change it up a little, I will use PowerShell instead of the command prompt.
We are going to begin by using Docker Machine to create a Linux VM with Docker installed. Then I will show you how to convert the SSH keys to work with Putty. Once on the machine with Putty, we will install all types of tools to make an awesome build machine. Once we are done, we will have a new Linux build machine with the following tools:
- Docker
- .NET Core 1.0
- Java JDK
- Nodejs
- NPM
- Gulp
- Grunt
- Bower
- Maven
- Ant
- Gradle
The first thing we are going to need is a Docker host. We are going to use Docker Machine to provision our host in Azure for us. To get Docker Machine, you need to install the Docker Toolbox from here.
- Download Docker Toolbox from https://www.docker.com/products/docker-toolbox
- Double-click the exe
- Click Next
- Click Next
For our purposes, the only required options are Docker Client for Windows and Docker Machine for Windows. - Click Next
- Check Add docker binaries to PATH
- Click Next
- Click Install
- Click Finish
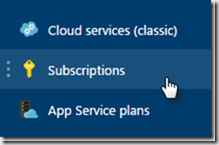 With Docker Toolbox installed, we can use Docker Machine to create our host in Azure. Docker Machine requires your Azure Subscription ID to create your host, so we need go get that now.
- Log in to the Azure Portal
- Click Subscriptions from the menu
- Copy your Subscription Id
With your Azure Subscription Id, we can now create a Docker host in Azure.
- Open the PowerShell
- Enter the following command:
docker-machine create -d azure --azure-subscription-id {Azure Subscription ID} --azure-open-port 80 --azure-resource-group {resource group name} {vm name in all lowercase}
If you care to see all the options, you can read the Azure driver docs here.
- Copy the code presented
The console window will appear to freeze. At this point, copy the code presented and proceed to the next step.
- Visit https://aka.ms/devicelogin
- Enter the code
- Press Continue
- Log in to your Azure Subscription
- Enter the following command and make note of the IP address and the DOCKER_CERT_PATH which we will need to connect to the machine:
docker-machine env {vm name in all lowercase}
Docker Machine will now generate certificates, create a Linux Virtual Machine in Azure, and configure Docker on that machine.
To install all the other tools we have to connect to the machine. When Docker Machine creates the image, it only enables certificate based SSH connections. I use Putty as my SSH client. However, the certificates generated are not compatible with Putty. Good news is there is a tool that can convert the certificates generated by Docker Machine into certificates supported by Putty so we can connect to the machine. From the Putty Download Page, download the following tools:
The first thing we need to do is use puttygen.exe to convert the generated id_rsa file to a Putty ppk file.
- Start puttygen.exe
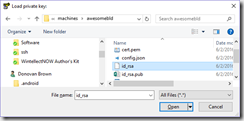
- Click Load
- Browse to the folder copied from the docker-machine env command above
- Open id_rsa
- Click OK
- Click Save private key
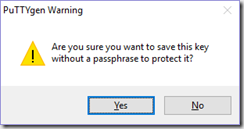
- Click Yes
- Save file as id_rsa.ppk in the same folder as the id_rsa file
- Select File / Exit
With the key generated, we can now connect to the VM using Putty.
- Start putty.exe
- Enter the IP copied from the docker-machine env command above into Host Name (or IP address)
- Select Data under the Connection node
- Enter docker-user into Auto-login username
- Select Auth under the Connection / SSH node
- Click Browse…
- Browse to the folder copied from the docker-machine env command above
- Open id_rsa.ppk
- Select the Session node
- Enter {vm name in all lowercase} into Saved Sessions
- Click Save
- Click Open
- Click Yes
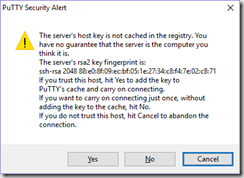
You are now connected to your Linux machine. Docker is already installed and configured. It is now time to install the tools and build agent. We are actually going to do this using a Bash script you can download from GitHub. This will install all the tools listed above for you.
Before we can use the script, we need to collect a couple of pieces of information. The first is a Personal Access Token.
- Log into Visual Studio Team Services
- Click your name in the upper right-hand corner
![image_thumb[15] image_thumb[15]](http://donovanbrown.com/image.axd?picture=image_thumb%5B15%5D_thumb_3.png)
- Click My security
- Click Add
- Enter appropriate values
- Click Create Token
- Copy the token value and store it somewhere safe

If you are the owner of the account you should be good to go. If however, you are not the owner of the account you need to make sure your account has permissions to add an agent. Add the user you created the Personal Access Token for to both Agent Pool Administrators and Agent Pool Service Accounts.
- Log into your Visual Studio Team Services account
Stay at the account level. Do not browse to a project.
![image_thumb[1] image_thumb[1]](http://donovanbrown.com/image.axd?picture=image_thumb%5B1%5D_thumb.png)
- Click the Collection settings gear icon in the upper right-hand corner
If the tool tip for the gear reads Project settings, you are at the wrong level. Click Team Services in the upper left-hand corner to return to the account level.

- Click the Agent pools tab
- Select the desired pool
- Click Roles
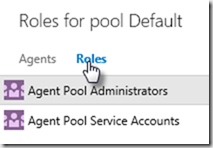
- Select the Agent Pool Administrators group
- Click the Add… button
| Field |
Value |
| User or group |
email of the desired user |
- Select the Agent Pool Service Accounts group
- Click the Add… button
| Field |
Value |
| User or group |
email of the desired user |
- Click Save changes
Before we run the script, I like to make sure no other processes have locks on any of the files we will be modifying during the setup. You can do this by issuing the following command:
sudo apt-get install -f
If you get any errors or warnings, correct those before you continue. Once you get output similar to the one below, you are ready to go.

One nice thing about Putty is you can paste text into the terminal. I normally open Notepad or some other simple text editor to get the command right before I paste it into putty.
- Replace all values in {} with your data.
wget -O - https://raw.githubusercontent.com/DarqueWarrior/linuxSetup/master/linuxSetup.sh | bash && cd ~/Agents/a1 && ./config.sh --acceptteeeula --runasservice --url https://{YourAccount}.visualstudio.com --auth PAT --pool {AgentQueue} --token {YourToken} --agent {NameForAgent} --work _work && sudo ./svc.sh install && sudo ./svc.sh start
- Copy to clipboard
- Right-click in Putty window
- Press Enter
- Enter your sudo password
- Sit back and relax
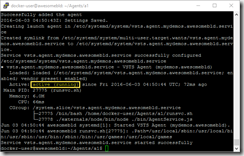
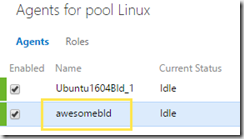
Once the script completes, you can view your agent in Team Services.
